rem 環境によって変えてね
set im=C:\Progra~1\ImageMagick-6.3.5-Q16
rem スケッチ処理+白黒化
%im%\convert.exe sf.jpg -modulate 90,150 -sketch 0x30+60 -modulate 70,150 -fx "(r+g+b)/3" sample201a.jpg
rem 空の部分以外を若干青めにして、ぼかしをかけて湿気を表現
%im%\convert.exe sf.jpg -channel a -fx "(hue>0.47&&hue<0.69&&luminosity>0.5)?0:0.4" -channel r -fx "0.7*0" -channel g -fx "0.7*p" -channel b -fx "0.8*p" -channel rgba -blur 0x2 sample201b.png
rem 重ね合わせ
%im%\convert.exe sf.jpg -modulate 100,60 -channel rgba sample201b.png -composite ( sample201a.jpg -channel a -fx "0.4" -channel rgba ) -composite sample201c.jpg
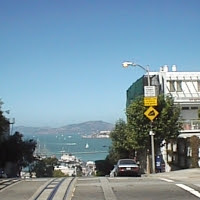
元画像(sf.jpg)

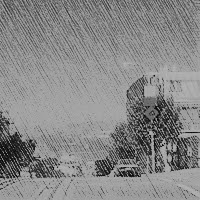
中間画像(sample201a.jpg):斜線が付いた昔の書籍の白黒写真風になります。

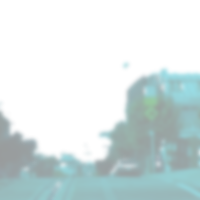
中間画像(sample201b.png):青空以外の部分を切り取って、青みを増させ、ぼかします。

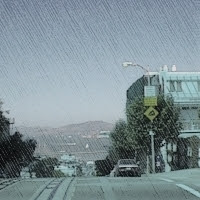
出力画像(sample201c.jpg):元画像の彩度を落とした画像+上の2つの画像を
重ね合わせた画像です。

2008/01/04追記
ver6.3.7では、以下のバッチのように-matteを追加します。
rem 環境によって変えてね
set im=C:\Progra~1\ImageMagick-6.3.7-Q16
rem %im%\convert.exe sf.jpg -modulate 90,150 -sketch 0x30+60 -modulate 70,150 -fx "(r+g+b)/3" sample201a.jpg
%im%\convert.exe sf.jpg -matte -channel a -fx "(hue>0.47&&hue<0.69&&luminosity>0.5)?0:0.4" -channel r -fx "0.7*0" -channel g -fx "0.7*p" -channel b -fx "0.8*p" -channel rgba -blur 0x2 sample201b.png
%im%\convert.exe sf.jpg -modulate 100,60 -matte -channel rgba sample201b.png -composite ( sample201a.jpg -matte -channel a -fx "0.4" -channel rgba ) -composite sample201c.jpg
2008/07/13追記
ver6.4.0あたりからluminosityからlightnessに変わったので、以下のバッチを実行します。
rem 環境によって変えてね
set im=C:\Progra~1\ImageMagick-6.4.2-Q16
%im%\convert.exe sf.jpg -modulate 90,150 -sketch 0x30+60 -modulate 70,150 -fx "(r+g+b)/3" sample201a.jpg
%im%\convert.exe sf.jpg -matte -channel a -fx "(hue>0.47&&hue<0.69&&lightness>0.5)?0:0.4" -channel r -fx "0.7*0" -channel g -fx "0.7*p" -channel b -fx "0.8*p" -channel rgba -blur 0x2 sample201b.png
%im%\convert.exe sf.jpg -modulate 100,60 -matte -channel rgba sample201b.png -composite ( sample201a.jpg -matte -channel a -fx "0.4" -channel rgba ) -composite sample201c.jpg
関連項目
ImageMagickで徐々に画像がスケッチ調になるように加工する
No comments:
Post a Comment